
Though my boyfriend loves all the breads I make, for sandwiches he was still buying the cheap white bread at the grocery store. None of my homemade breads were what he wanted. If I got them soft and fluffy, they were too sweet. If I got the taste right, the crumb was too firm and dry… So, I searched far and wide and, melding a few different recipes together, came up with this. He has told me he will never buy sandwich bread at the store again, unless I don’t have this one on hand.
Ingredients:
- 400 mL warm water (about 1.75 cups)
- 2.5 tsp active dry yeast
- 1 tsp white sugar
- 1 Tbs honey
- 3/4 tsp salt
- 2 Tbs unsalted butter – cut into small pieces and at room temperature
- 4.5 cups bread flour
- 2 Tbs Dry Milk Powder (this is optional – see notes)
- 1 Tbs butter for brushing over the top of the baked bread if desired
Instructions:
- In a mixing bowl, add the yeast, warm water (110 – 120 deg F), and sugar. Whisk together and let stand about 5 minutes or until foamy. If the mixture does not foam, either your water was not warm enough, or your yeast is no longer active.
- With a beater blade on your mixer, stir in the honey, salt, and the 2 Tbs butter.
- Add flour gradually, until your mix is a smooth batter.
- Add in the milk powder if you are using it and mix in well.
- Replace the beater blade with a dough hook and on speed 2, continue adding the flour until the dough no longer sticks to the sides of the bowl. Now, slowly add flour, tablespoons at a time, until you have a firm dough ball that when poked with your finger, bounces back. You can finish the kneading process on a floured counter if you prefer this method. I do it sometimes because I can more easily feel how springy the dough is getting.
- On a floured surface, cut the dough ball in half with a knife or bench scraper.
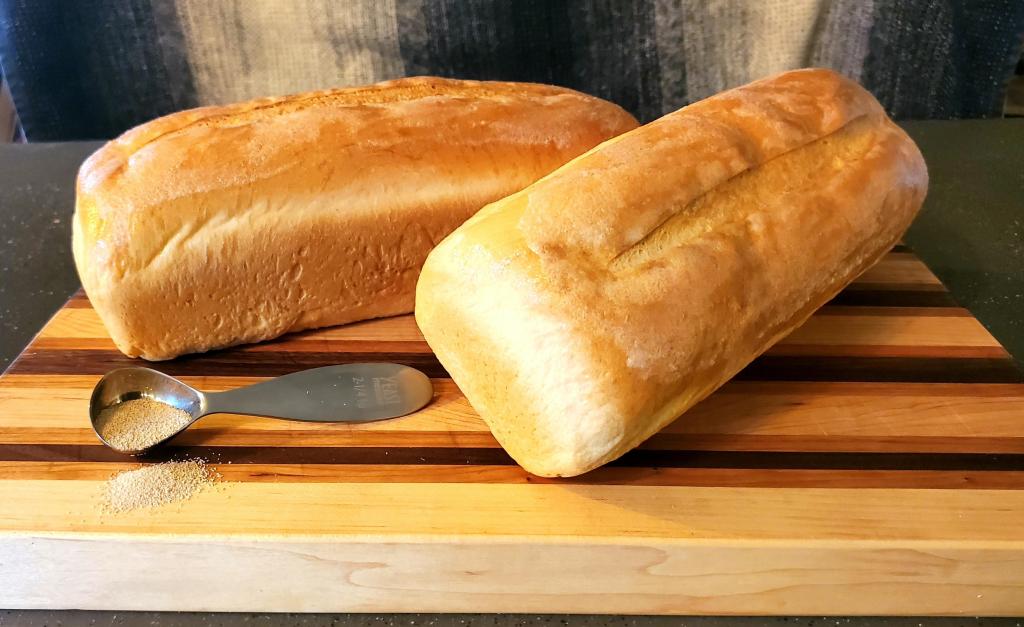
- Roll each of them out to a 10×12″ rectangle (or thereabouts). Starting on the short end, roll the dough up tightly. Pinch the seam to close it.
- Place each rolled dough log into a greased 12×4.5″ loaf pan, seam side down. Tug them lightly to almost fill the length of the pans, then tuck the ends under the log.
- Lightly dust the tops of the loaves with flour and cover with a towel. Place in a nice warm and cozy spot and allow to rise for an hour, or until doubled in size.
- Near the end of the rise time, preheat your oven to 350 degrees F.
- I like to run a very sharp knife or razor blade down the length of each loaf before baking, but that is completely up to you.
- Bake the loaves in the preheated oven for about 35 to 40 minutes. They should be nice and golden and when you lift them, they should feel lighter than they look.
- Rub butter over the still hot loaves if you like (I do it with a stick of butter, but you can melt and brush if you prefer).
- Place the loaves on a cooling rack and make sure they are completely cooled before storing. I have left mine out overnight, wrapped in a towel and they don’t get dried out.
Notes:
- I use the milk powder because it seems to help the rise, making the dough a little lighter and fluffier. It also makes the bread last longer – mine lasts up to twice as long before getting mold and becoming chicken feed.
- Don’t get hung up on using exactly 4.5 cups of flour. The amount of flour you will need to add may be more or less than what the recipe calls for. You’ll do that mostly by feel and texture.


Leave a comment